A Beginners Guide
Whether you’re tracking in a studio or plugging into a live PA, you’ve likely seen a small metal box sitting between an instrument and the mixing board. From guitars and basses to synthesizers and laptop playback rigs, the DI box is the unsung hero of a clean signal chain. This guide breaks down what they do and why they are essential for your rig.
What is a DI Box?
DI stands for “Direct Injection.” While they are frequently associated with guitars and basses, their core function is to solve impedance mismatches and balance the signal between any electronic instrument and professional audio equipment.
Most instruments produce a high-impedance (High-Z), unbalanced signal. This type of signal is fragile—it’s susceptible to noise, hum, and high-end signal loss (known as “tone suck”), especially over cable runs longer than 20 feet. A DI box conditions this signal, converting it to a low-impedance (Low-Z), balanced signal that is compatible with mixing consoles and audio interfaces.
The Core Function: Impedance Matching and Balancing
A DI box is a specialized circuit that serves two critical roles in maintaining your signal integrity:
- Impedance Matching: Think of impedance like the flow of water through a pipe. A narrow pipe (High-Z) resists flow more than a wide pipe (Low-Z). If you try to force a High-Z signal directly into a Low-Z microphone input, the mismatch “loads down” your instrument’s output, rolling off high-end frequencies and making your transients sound sluggish. A DI box matches these impedances so your instrument’s full frequency range is preserved.
- Signal Balancing: Standard instrument cables are unbalanced and act like antennas for hum and radio interference. A DI box converts this to a balanced signal (via XLR), which uses phase cancellation to strip away noise. This allows your signal to travel through long cable runs with significantly less degradation.
Passive vs. Active DI Boxes: Choosing the Right Tool
Choosing between passive and active depends on the “output” of the gear you are plugging in. A simple rule of thumb for musicians is “Opposites Attract.”
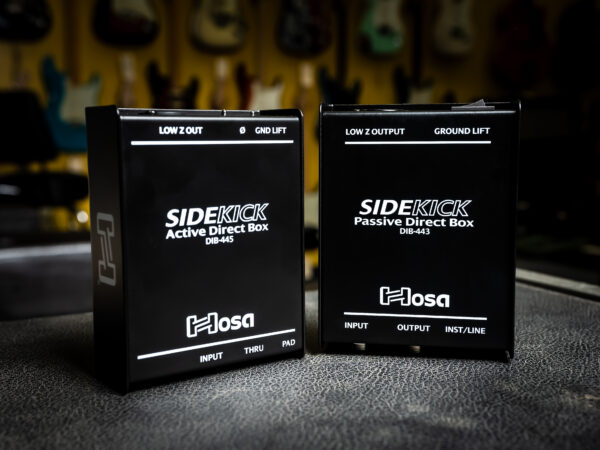
The Passive Choice: Hosa DIB-443 Sidekick
Passive DIs use a transformer to match the signal and require no power. They provide natural electrical isolation and handle “hot” signals without distorting. These are the “safe” choice for high-output gear.
- Best for: High-output sources with internal preamps, like electronic drums, DJ mixers, or acoustic-electric guitars with onboard batteries.
- View the Hosa DIB-443 Sidekick Passive DI Box
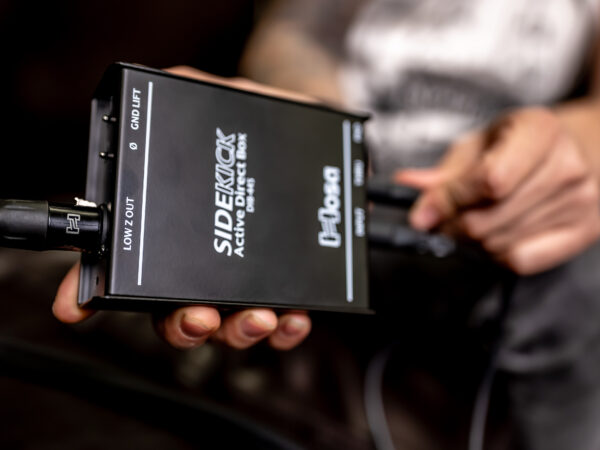
The Active Choice: Hosa DIB-445 Sidekick
Active DIs include a preamp circuit and require 48V phantom power. They provide a high-headroom “buffer” that protects and preserves the life of weaker signals.
- Best for: Passive instruments with no internal power, such as a standard electric guitar or a vintage-style bass.
- View the Hosa DIB-445 Sidekick Active DI Box
The Pro Stereo Solution: Hosa DIB-490 Pro-Conex

For modern stereo sources like stage pianos, synths, or laptop playback, the Hosa Pro-Conex DIB-490 is the high-fidelity choice. While passive DIs are safe for keyboards, the active circuitry in the DIB-490 keeps your transients sharp and frequency response wide, preventing the subtle “dulling” effect that passive transformers can sometimes have on complex digital patches.
The Troubleshooting Toolkit: Key Features
Once you have selected your DI, you need to know how to use the “safety features” built into the chassis to solve real-world stage problems:
- Ground Lift: This switch breaks the physical connection between grounds to eliminate 60-cycle hum and ground loops instantly.
- Thru / Bypass: This allows you to “tap” your signal—sending one clean feed to the mixer while simultaneously passing the unaffected signal to your stage amplifier so you can hear yourself.
- Pad: If your keyboard or DJ mixer is “clipping” (distorting) the console, the Pad switch attenuates the signal level to keep the audio clean and manageable.
Real-World Scenarios: Which Problem Are You Solving?
Most musicians and engineers reach for a DI box when they encounter one of these common frustrations. Here is how to map the problem to the solution:
The Problem: “My acoustic guitar or bass sounds thin and brittle through the PA.”
- The Cause: Your passive pickups are being “loaded down” by the mixer, resulting in high-end loss and a weak signal.
- The Hosa Solution: The DIB-445 Active Sidekick. Its phantom-powered buffer provides the impedance matching needed to restore the life, warmth, and detail of your instrument.
The Problem: “The sound engineer says my stage volume is washing out the mix.”
- The Cause: Low frequencies are omnidirectional, meaning your bass amp “bleeds” into every open mic on stage—especially vocals and drums.
- The Hosa Solution: A Hosa Sidekick DI. By providing a direct, isolated signal, you allow the engineer to control your volume in the PA without your stage amp muddying up the rest of the band.
The Problem: “My electronic drums or keyboard are distorting the mixer, even with the gain turned down.”
- The Cause: High-output (active) instruments send a “hot” signal that can easily overdrive a microphone preamp.
- The Hosa Solution: The DIB-443 Passive Sidekick. Its transformer-based design naturally handles high-voltage signals without clipping, and the built-in attenuation gives you the extra headroom needed to keep your signal clean.
The Problem: “I have a loud buzz in my monitors that won’t go away.”
- The Cause: You likely have a ground loop between the gear you are plugged into (instrument, laptop, DJ gear, etc.) and the mixing console.
- The Hosa Solution: Any Hosa Sidekick DI. Use the Ground Lift switch to break the physical connection between grounds and silence the hum instantly without affecting your tone.
The Problem: “My laptop backing tracks are distorted and the cable setup is a mess.”
- The Cause: Laptop outputs are often too “hot” for mic inputs, and using multiple mono DIs adds unnecessary clutter to your rig.
- The Hosa Solution: The DIB-490 Pro-Conex Stereo DI. Use the built-in Pad to tame the hot signal and handle your entire stereo image with a single, professional chassis.
DI Spotlight: Mastering the Thru Jack and Parallel Processing
One of the biggest advantages of using a DI box in the studio or on stage is the ability to capture a “Dry” signal while still using your “Wet” (effected) sound. By using the Thru/Bypass output, you can send your pure instrument signal directly to the recording interface (Dry) while simultaneously sending the same signal through your pedals and amplifier (Wet).
Beyond simple recording safety nets, the Thru jack is a vital tool for several professional configurations:
- The Multi-Amp Setup: Bassists often use the DI output to send a clean, deep low-end signal to the PA system while using the Thru jack to feed a distorted or “gritty” stage amplifier for mid-range punch and monitoring.
- Stage Physics and “Bleed” Control: This is why bassists use DIs most often. Because low frequencies are omnidirectional, a loud bass amp can “bleed” into every other open microphone on stage—especially the drum and vocal mics. By using a DI, you provide the sound engineer with a clean, isolated signal that doesn’t rely on a microphone, giving them total control over the mix without the stage volume washing out the rest of the band.
- Silent Stage Monitoring: If you are using In-Ear Monitors (IEMs), you can send your DI signal to the monitor desk while using the Thru jack to keep a tuner or a small personal mixer at your feet without interrupting the main signal path.
- Future-Proof Tracking: In the studio, keeping a “Dry” DI track is your ultimate safety net. If you decide later that your original amp tone doesn’t fit the mix, you still have the pristine, unprocessed track ready for re-amping or software processing.
Connecting It All
Once you’ve identified the right DI for your setup, the final step is ensuring you have the “connective tissue” to maintain that signal integrity. To get up and running, you will need:
- The Input: A high-quality instrument cable (1/4-inch jack) to connect your source to the DI input.
- The Output: A balanced XLR cable to connect the DI output to your mixing console or audio interface.
By understanding how a DI box conditions your signal and utilizing these troubleshooting tools, you move beyond just “plugging in.” You’re actively protecting your tone and ensuring a professional, noise-free path for every performance. Whether you’re a gigging bassist, a synth enthusiast, or a playback engineer, the right DI is the difference between a “hummy” compromised sound and a studio-quality output.
Don’t be afraid to experiment with different DI models to find the perfect match for your specific gear. Your audience—and your sound engineer—will thank you.
