Item added to cart ×

How to Use Hosa’s Universal Power Adapter

How to Use Hosa’s Universal Power Adapter

While most electronic devices come with their own power supplies, some do not. Even when they do, we sometimes misplace or lose them among a sea of cables. The Hosa ACD-477 Universal Power Adapter is an inexpensive, portable, and versatile solution, ideal for most small electronic devices.

Voltage

AC Input Voltage

The Hosa ACD-477 Universal Power Adapter auto-detects AC input from 100-240V, 50/60Hz allowing for global use. All you need for use outside of the United States is a US to local power plug adapter.

Hosa ACD-477 Universal Power Adapter Details

DC Output Voltage

Many devices on the market have different voltage requirements, and the Hosa ACD-477 Universal Power Adapter allows you to switch from 3, 4.5, 6, 7.5, 9, or 12 V operation with a simple turn of the knob on the face of the adapter. Just make sure to have the ACD-477 unplugged from any device when changing DC output voltage. The ACD-477 runs at 80% efficiency with a 1200mA maximum output.

Hosa ACD-477 Universal Power Adapter Front

Plugs & Polarity

Many small electronics are made with many different sized plugs. The Hosa ACD-477 Universal Power Adapter conveniently comes with six of the most common types on the market, giving you the versatility to use the same power supply across multiple devices.

Hosa ACD-477 Universal Power Adapter Plugs

The polarity can easily be changed between positive and negative if required by simply reversing the plug. If you require negative polarity, align the “-” sign with the “TIP”, and likewise for positive polarity, align the “+” sign with the “TIP”. Make sure you are always using the correct polarity for any device in order to avoid damaging the electronics.

Hosa ACD-477 Universal Power Adapter TipHosa ACD-477 Universal Power Adapter Tip+

Short Circuit Protection

To protect your device from experiencing electric spikes which could damage them, the Hosa ACD-477 Universal Power Adapter has a built in SCP (short circuit protection). When the LED light starts to dim, you should unplug your device to prevent any damage.

Portability

Many professionals keep safeguards when they’re at a gig in case there is some type of failure. The Hosa ACD-477 Universal Power Adapter is light, small, and the AC plug folds into the design, saving storage space and making it even more compact for the gigging professionals.

Daisy Chain Extension Cord

For devices like pedalboards where you can utilize one power supply for multiple devices, Hosa also offers the PDC-373 Daisy Chain Extension Cord. These split a single 2.1 mm DC plug to up to 2.1 mm DC jacks, often used for guitar pedals.

Interested in purchasing your own Hosa ACD-477 Universal Power Adapter? Get yours today.

- Hosa

Setting Up Your TRACKLINK USB Interface

Hosa’s TRACKLINK USB interfaces give players and creators the option of bypassing a traditional audio interface in order to record or practice. TRACKLINK interfaces are USB cables with ¼ inch, XLR, or MIDI connectors on one end meant for guitar, microphone, and keyboards.

Getting set up with TRACKLINK is quick, easy, and convenient. We’ll take you through the setup steps for both Mac and Windows operating systems, but bear in mind there may be some variation as operating systems (OS) are often updated. The same rule applies to the recording software (DAW) you’re using, since all have some degree of difference in how they arm inputs.

XLR or ¼ inch to USB

First start by plugging the UXA-110 into a microphone, the USQ-110 into a guitar or ¼ inch output, then directly into your computer and follow the directions below based on your OS:

Mac OS 10.0 or later

  1. Go to Apple Menu > System Preferences and click Sound
  2. Click the “Input” tab
  3. Select “USB PnP Sound Device”
  4. Input level of your computer should reflect incoming signal
  5. Click the “Output” tab
  6. Verify your normal output option is selected
  7. Close window

Windows 10

  1. Allow Windows to install the driver before proceeding
  2. Go to Start Menu > Windows System > Control Panel
  3. In Category View, open Hardware & Sound
  4. Open Sound
  5. In “Playback” tab, select your desired playback option and click the “Set Default” button
  6. Click the “Recording” tab
  7. Select “USB PnP Sound Device” and click the “Set Default” button
  8. You can verify and adjust input levels by clicking the “Properties” button
  9. If you made any changes, click the “Apply” button
  10. Click the “Okay” button

*If you have Windows 7 or Vista, here are links to additional instructions for the UXA-110 and USQ-110.

Start Recording with Your TRACKLINK

Each software will be a little different, but it is important to select the TRACKLINK USB interface as input only and arm your audio track. Make sure the levels are low enough so you don’t pick up unwanted noise.

Below are quick visual guides for setting up your TRACKLINK USB interface:

MIDI to USB

First start by plugging the USM-422 into your keyboard, synthesizer, or drum machine, and then directly into your computer. Be sure that the red input is plugged into your keyboard’s output, and the black output is plugged into your keyboard’s input, then follow the directions below based on your OS:

Mac OS 10.0 or later

  1. Go to Applications > Utilities and open Audio MIDI Setup.app
  2. If MIDI window is not visible, go to the top menu and select Window > Show MIDI Window
  3. Verify an active device named “USB 2.0 MIDI” exists
  4. Highlight device and select “Test Setup”
  5. Clicking the arrow pointing out of the USB 2.0 MIDI icon should cause the green light on the TRACKLINK interface to flicker
  6. Playing keys on your MIDI keyboard should cause the blue light to flicker and the IN arrow in the computer’s MIDI window to become active
  7. If the test succeeds as explained above, close the window

Windows 10

  1. Allow Windows to install the driver before proceeding
  2. Go to Start Menu > Windows System > Control Panel
  3. In Category View, open View Devices & Printers under the Hardware & Sound category
  4. Confirm “USB 2.0 MIDI” icon is present
  5. Close Control Panel

*If you have Windows 7 or Vista, you can find additional instructions here.

Functions and Indicators

• Solid red LED indicates proper USB connection
• Flashing green LED indicates MIDI transmission from computer
• Flashing blue LED indicates transmission from MIDI controller

Start Recording

Remember that MIDI transfers only data, not audio, so you need to arm the MIDI track in your DAW with a sample. A demonstration for how to assign the input and arm the track for PreSonus Studio One can be seen here:

Below is a quick visual guide for setting up your TRACKLINK USB MIDI interface:

TRACKLINK Limitations

It’s important to note that any cable of this variety is taking the place of a traditional audio interface, and thus all of the analog-digital conversions happen inside the cable. Given the size and component limitation, you can sometimes pick up extra noise or experience some latency. These are not meant to be a 1:1 direct replacement for a proper audio interface, but rather a simple and affordable solution for beginners or those who don’t feel a traditional interface is necessary for their limited purposes.

For more information on where to purchase a TRACKLINK USB interface, you can find a local or online Hosa reseller here.

- Hosa

How to Wrap a Cable

After using our audio cables, most of us don’t think about the proper way to wrap them other than to quickly get them out of the way and cram them into whatever space available. However, the way you wrap and store your cables can have a significant effect on their longevity.

Incorrect Ways to Wrap a Cable

Over-Over

This is definitely the most common wrapping method out there. On the surface, it makes sense, right? You wrap the cable in the same consistent motion.

Wrap Cable Over Over Twist Hosa

Wrap Cable Over Elbow Twist Hosa

The problem with wrapping cable in this way is that the cable is continually twisted along its length and when dropped, there are all sorts of tangles and kinks that must be laboriously undone.

Aside from the simple inconvenience, the twisting over time can put stress on the cable and increase the likelihood of internal shorts which may cause it to stop working, or open gaps in its shielding, allowing for more interference. This is especially important for instrument cables and microphone cables, which are prone to pick up more noise.

Tying

Some will wrap their cables in a bunch, or do the over-over method and then use the cable to tie itself together. This adds even more stress to the cable and will decrease its life significantly quicker, so we highly discourage you from this method.

Tie Cable Around Itself Hosa

The Correct Way to Wrap a Cable

Over-Under

It may be a little funny to get used to at first, but once you start wrapping your cables in this way it becomes very intuitive. As we mentioned before, the issue with the over-over cable wrapping method is that the cable is continually twisted along its length. The over-under method means as you are twisting with the “over”, you are untwisting with the “under”.

Wrap Cable Correct Over Under Hosa

Wrap Cable Correct Over Under Hosa

This will reduce the tension on the cable while wrapping and as it’s stored, making it easier to uncoil and ultimately increasing the cable’s longevity.

You’ll know you’re doing it right when you can throw your cable and it uncoils without any snarls or kinks.

Toss Cable Flat Wrapped Correctly Hosa

Cable Storage

When storing your cables, try to keep them either hanging or laying in a relaxed position as much as possible. Cable ties come in very handy for keeping your cables neatly organized and separated, especially if you have them in a pile or gig bag. Hosa offers a wide array of cable organizers to help keep things efficient depending on your preferences.

Wrap Cable Wire Tie Velcro Hosa

If you’ve had cables stored for a while that you don’t frequently use and don’t know whether they still work or not (because you certainly don’t want to test them at a gig), it’s also helpful to invest in a cable tester. This allows you to test each connection point on your cables and make sure everything is in working order before putting them into commission.

- Hosa

How to Set up a Guitar Pedalboard

With so many effects and hybrid multi-effects guitar pedals on the market, it’s easy for beginners to quickly feel overwhelmed. There is a conventional order for guitar pedals based on which effects ideally work with a dry or processed audio signal. We’ll do our best to demystify things as briefly as possible.

Choosing the Right Pedalboard – The right dimensions to fit all your pedals
How to Power Your Guitar Pedalboard – Choosing the right power supply
Finding the Right Footswitches – Controlling the channels on your amplifier
Connect Your Pedals with Patch Cables – Figuring out the right length and space
Define Your Guitar Pedalboard Order – A suggested order of effect types and why
True Bypass vs Buffered Bypass – A simple explanation of different bypass types

Guitar Pedalboard Mini Hosa

The Most Important Rule is There Are No Rules

While many guitarists place pedals in a conventional way, there are no set rules. Just remember that when you have multiple effects engaged, the pedals closer to the end of the chain will filter the entire sound before it. The most important thing is to be creative and find the sound that inspires you. If that means you assemble your pedals in an unusual order, nobody can tell you you’re wrong.

Your Guitar Pedalboard Set-up – Getting Started

The guitar pedal market has exploded in recent years, saturating the market with options galore for every piece you could use for your pedal board setup. With so many options, it’s important to know what to look for and do your research.

Choosing the Right Pedalboard

If you’re like the average guitarist, pedals probably find their way on and off your board. It’s important to know when building a guitar pedalboard how many pedals you need, between those you currently have and maybe some you expect to get in the future. Pedalboards come in many different shapes and sizes to accommodate large and small setups. One helpful resource is the Pedaltrain Pedalboard Planner. You can select from popular pedals and the different size boards Pedaltrain offers to see how they fit.

The market also offers many configuration options. Some pedalboards will have small holes to hide your cables discreetly underneath the board like the Templeboards Duo Series, or several horizontal strips like the Pedaltrain Classic. Another option is to have a switcher built into the pedalboard like the Voodoo Lab Dingbat, which helps you program multiple pedal paths and combinations with a single switch. For those with a very large pedal setup, the Vertex Travel Plus includes a riser to add an additional level to your pedalboard without occupying more floor space. With this option you will lose the ability to engage some effects, so these are likely pedals that will always be engaged, or activated using a switcher.

Pedalboard Sizes – Powerful vs. Portable

The size of your pedalboard will be determined by the number of pedals you have, and also how you want to use it. If you’re somebody who is doing lots of gigging and carrying your equipment around all the time, chances are you will want the most portable solution, which favors smaller, lightweight options. If you mostly play and record at home, chances are greater that you love having your “space station”, and a more robust pedal board with all the bells and whistles may be what most inspires your creativity.

Guitar Pedalboard Hosa Edge Cables

How to Power Your Guitar Pedalboard

Each guitar pedal will require power to operate. Most pedals will have a DC output which gets powered through a power supply. There are many options on the market, but you want to make sure your power supply has enough outputs to power the pedals on your board, and with the correct voltage required for that pedal. It may not always be the most ideal solution, but it’s sometimes necessary to use a Daisy Chain Extension Cord from the same power source to various pedals.

The reason it’s ideal to use a designated power supply rather than just plugging directly into a wall is that a power supply can help isolate your pedals from interference and additional noise. Power pedals run on DC (direct current), while AC (alternating current) is the power that comes from our walls. Some pedals will come with “wall warts” that will transform AC into DC voltage and amperage, like 9 volts. Be mindful of the milliamps (mA) that your pedals require so you use the correct output on your power supply. Usually pedals are 100mA or below, but those higher would need a designated output with higher amperage to be powered.

Power Supply Build Pedalboard Hosa

Finding the Right Footswitches

For amps that have multiple channels, you may want to save room on your board for a footswitch. Some amps come with their own, but Hosa also makes TRS Footswitches that will work with most amplifiers and are economical in space.

Connect Your Pedals with Patch Cables

One thing you learn quickly is that cables take up a decent amount of real estate on a pedalboard. Each pedal has either side mounted or top mounted inputs and outputs that will influence both where they are placed on your board and what types of guitar patch cables are needed. For pedals connected right next to one another, 6” cables work best, but often you will need 12”, 18”, or 24” patch cables to connect pedals around your board.

As each pedalboard has unique requirements, Hosa currently offers seven variations of guitar patch cables. Hosa’s assortment provides players with nearly every option they could need, including variations in length, space-savings, and sonic integrity.

Guitar Patch Cables Edge Pro Pedalboard Hosa

Pedal couplers are also another option, though these are not great solutions for pedals that will be stepped on. This solution can damage the coupler or the jack on your pedals over time as jacks are never truly aligned perfectly and applying weight with your foot will add stress. If you use these, make sure they are for pedals that will always remain on and may be engaged with a loop switcher.

Define Your Guitar Pedalboard Order

When it comes to your sound, there is no exact science to follow, but below is a common order of effects based on how each will alter the signal before it.

1. Tuner

The best place for your tuner is right at the start of your chain. That’s because when you tune, you want the purest signal directly from your guitar. If a pedal were to be before it, the signal might be manipulated or degraded and tuning becomes inconsistent. Most tuners also mute anything after it in the chain when it’s engaged.

2. Filters

The most common filter is a wah pedal. These work well earlier in the chain to manipulate the raw sound of your guitar to then add textures with other effects later in the chain.

Wah Pedal Pedalboard Hosa

3. Compressors

Compression will add fullness to your sound. It can also help your playing sound more dynamically consistent, such as light and heavy strumming having a similar attack.

Compressor Pedal Pedalboard Hosa

4. Pitch Shifters

These are effects like octavers, arpeggiators, and anything that changes the pitch of the notes you play. You likely want these before any type of gain since a clean signal gets a more accurate representation of that pitch.

5. Overdrives

Probably the most common effect on any pedalboard, overdrives boost the signal from your guitar into the amplifier, which is why they are often called “boost pedals”. These are used to add some grit to clean sounds or tighten the low end on high gain amplifiers since they emphasize the midrange, and the guitar is a midrange instrument.

Overdrive Pedal Pedalboard Hosa

6. Gain

Distortion and fuzz pedals add compression and “dirt”, giving the sound a harder edge that is quintessential for rock and metal-style playing.

Gain Pedal Pedalboard Hosa

7. EQ

This is a hard guitar pedal to know where to place since it’s there to refine a sound, either to emphasize or minimize a certain frequency. Some players EQ the raw sound coming out of their guitars, others put it here after distortions, which can create harshness in certain frequencies that an EQ pedal will help tame.

8. Noise Gates

These can also go several places in the chain depending on where the most noise is generated that you want to control. Often noise gates are added after the gain stage, since increasing the gain also increases noise and distortions that not all players find pleasant, especially if they want a tight, articulated sound.

Noise Gate Guitar Pedal Pedalboard Hosa

9. Modulation

These effects include phasers, flangers, chorus, tremolo, and vibrato. You would most often use these to modulate the entire sound up to this point.

Modulation Pedal Pedalboard Hosa

10. Time-based

There is some debate among players as to whether the delay or reverb pedal should go first, but in most instances reverb goes after the delay. These pedals help give the listener an impression of the environment everything is being played in. Less reverb and delay makes things sound more focused, while lots of reverb and delay gives the listener the impression of a larger space and sound stage.

Time based Pedal Pedalboard Hosa

11. Volume

Some people also prefer to have the volume pedal in the beginning of their chain, meaning if they do volume swells, time based-effects like reverb and delay will give a more spacious, ambient trail effect. At the end of your chain, the volume pedal will quiet or silence everything immediately.

Volume Pedal Pedalboard Hosa

True Bypass vs Buffered Bypass

If you’re researching pedals, these are terms you have encountered many times. A true bypass pedal means that when it is disengaged, the signal passes through the pedal unaffected. While that doesn’t color your sound, it extends the run of cable through your board, which can sometimes lead to signal degradation. Buffered bypass pedals boost the signal even when disengaged, allowing for you to have longer cable runs without the signal strength degrading, though this will come with some form of coloration to the sound.

Change is Inevitable

Each year there are more and more new pedal options and manufacturers. Chances are you will go through different pedals and boards trying to find the right fit for you, or maybe it’s just fun to experiment with all the sounds and options out there. In either case, just as innovation and evolution are the norm in the pedal world, so should it be in your creativity. Experiment and blaze your own path.

If you want more information on the different patch cable styles Hosa offers, please visit the Guitar Patch Cables page on our website. With options from pancake style connectors to genuine Neutrik tips, Hosa’s assortment has what you need to best fit the type of board you’re making, on any budget.

- Hosa

Equipment Needed to Start a Podcast

How to Start a Podcast

Starting a podcast can be as simple or complex as you require. Very few components are needed to start, but your podcast setup can expand quickly. We’ll take you through the key pieces of equipment needed for a podcast, some suggestions, and how to stand out as a podcast host.

Before we talk about the podcast gear and equipment, it’s important to have a clear idea for the kind of podcast you want to start.

Should You Start a Podcast?

Podcasting is a medium that is seeing more and more creators every day. It’s become one of the most digested pieces of modern media. Successful podcasts can range from minutes to hours in length depending on the style, content, and audience.

Question is why do podcasts that are hours long succeed, when we’ve been telling each other for years that people’s attention spans are too small? The truth is probably a mix between the medium itself attracting an audience that enjoys long form content, and that people’s attention spans may not be as short as we think.

Unlike video content that tends to be more scripted, edited, and polished, podcasts have a very natural, conversational feel. They can just as easily be about niche interests or broad conversations that span from food recipes to the latest video game strategies in the same hour.

Given that it can be so simple and affordable to set up a podcast, it makes sense that new ones are popping up all the time. If you have any type of interest in a particular topic or something to say, chances are you already have most, if not all, of what you need to get started in podcasting.

So, what equipment do you need to start your own podcast?

What Equipment You Need for Podcasts
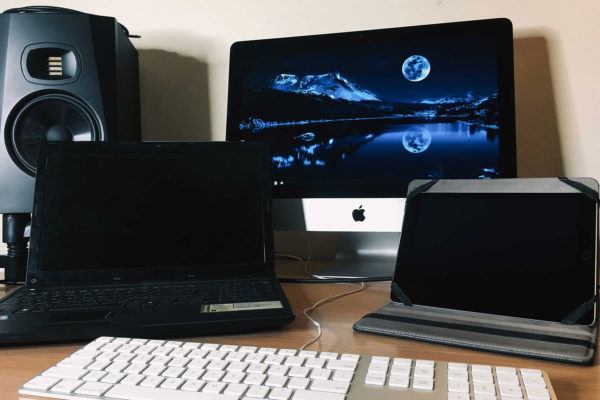
Computer

The thing everybody already has, right? The good news is recording audio requires modest CPU performance, so even if you have an older computer, you can likely make it work. As you look into software for your podcast, pay attention to the requirements and make sure your machine is compatible.
Podcast Equipment Computer iMac iPad Laptop Tablet Hosa

Audio Software for Podcasting

Make sure you have a DAW (Digital Audio Workstation) – this is the music production software that you will record your podcast audio into. Having the right DAW will also help should you need to edit or process your audio such as boosting levels, adding compression, or removing part of your podcast. Some free and inexpensive options available are:
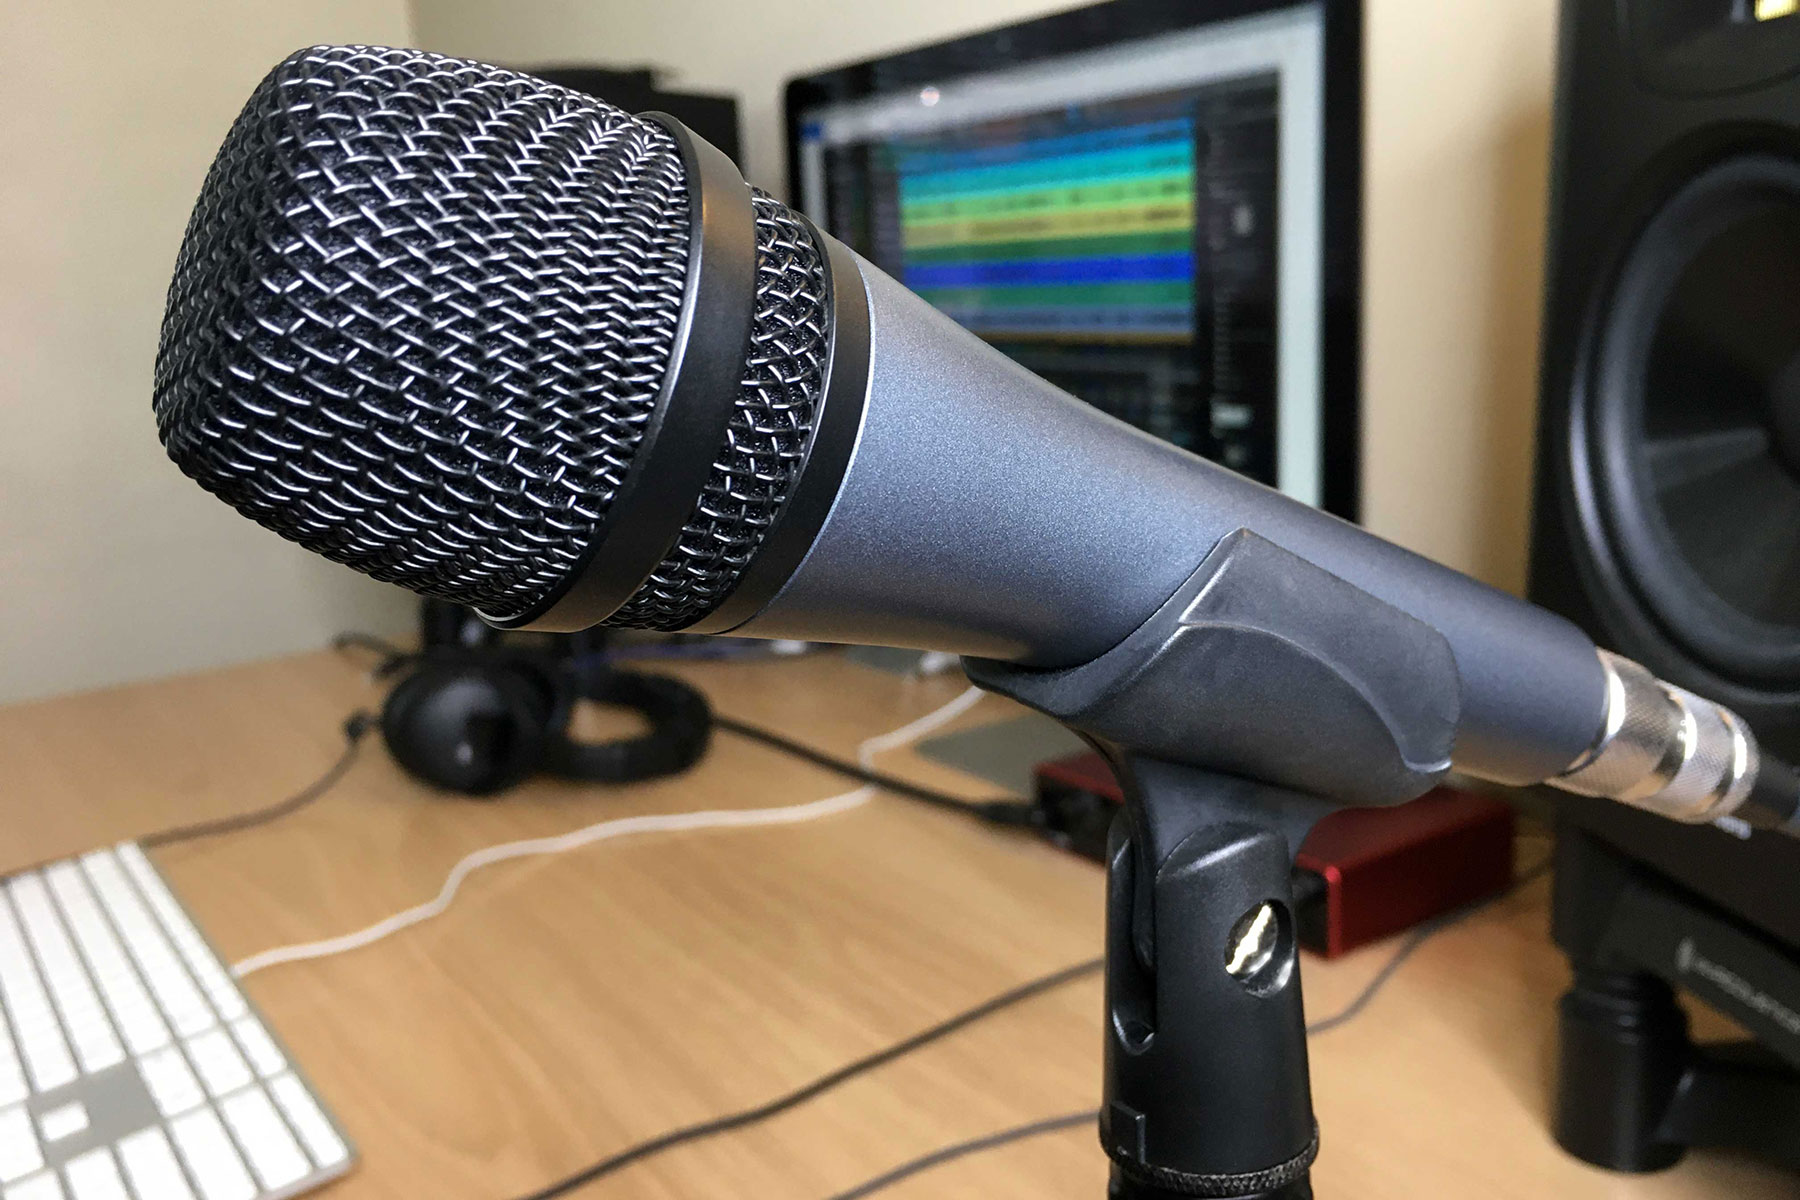
Podcast Microphones

Single Microphone Setups

If this is a podcast that only features yourself, one of the most convenient ways to get started is with a USB microphone. These will allow you to plug directly into your computer and bypass the need for an audio interface. Some popular options available are:

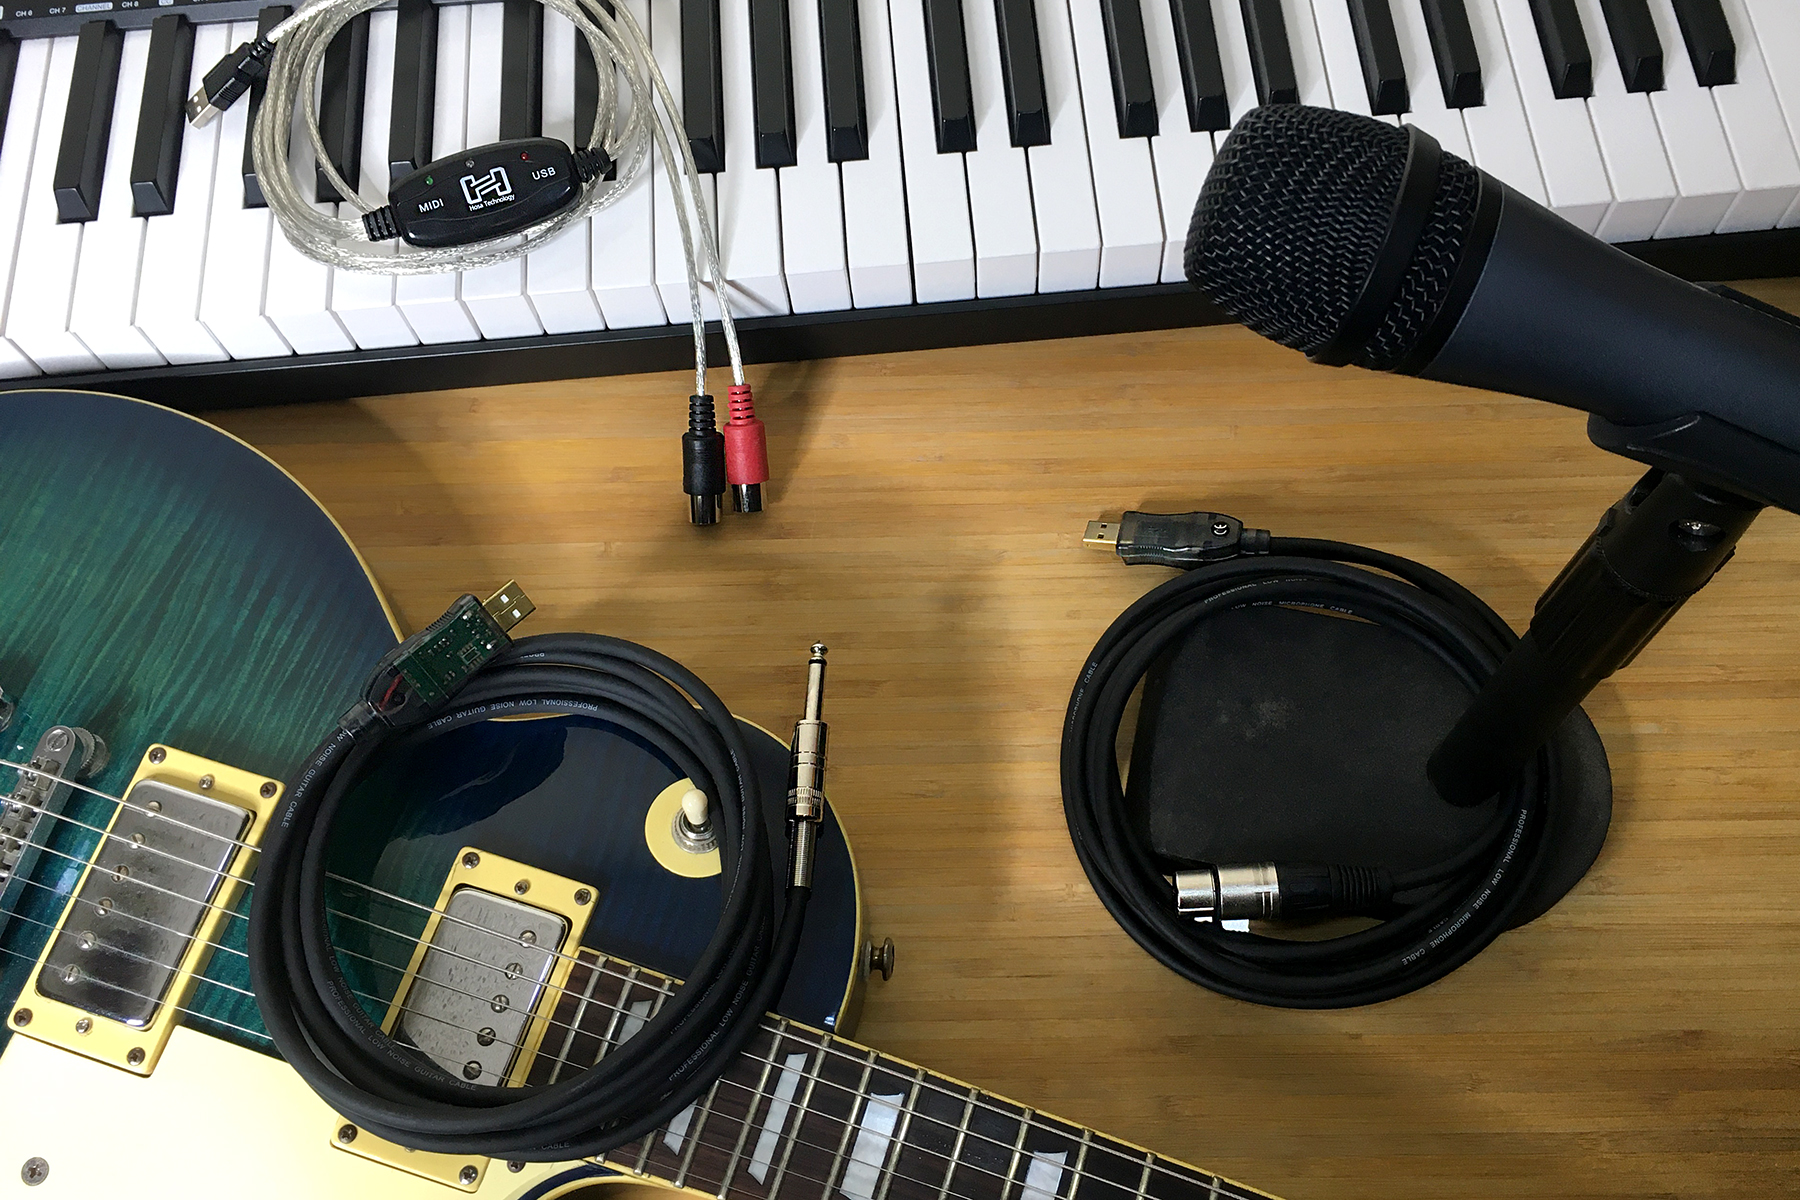
Should you already have a podcast microphone, Hosa’s TRACKLINK XLR to USB Interface cable allows you to plug your microphone directly into your computer and bypass an audio interface. Keep in mind with these solutions the analog/digital converters inside are quite small, which may result in some latency or additional noise.

Multiple Microphone Setups

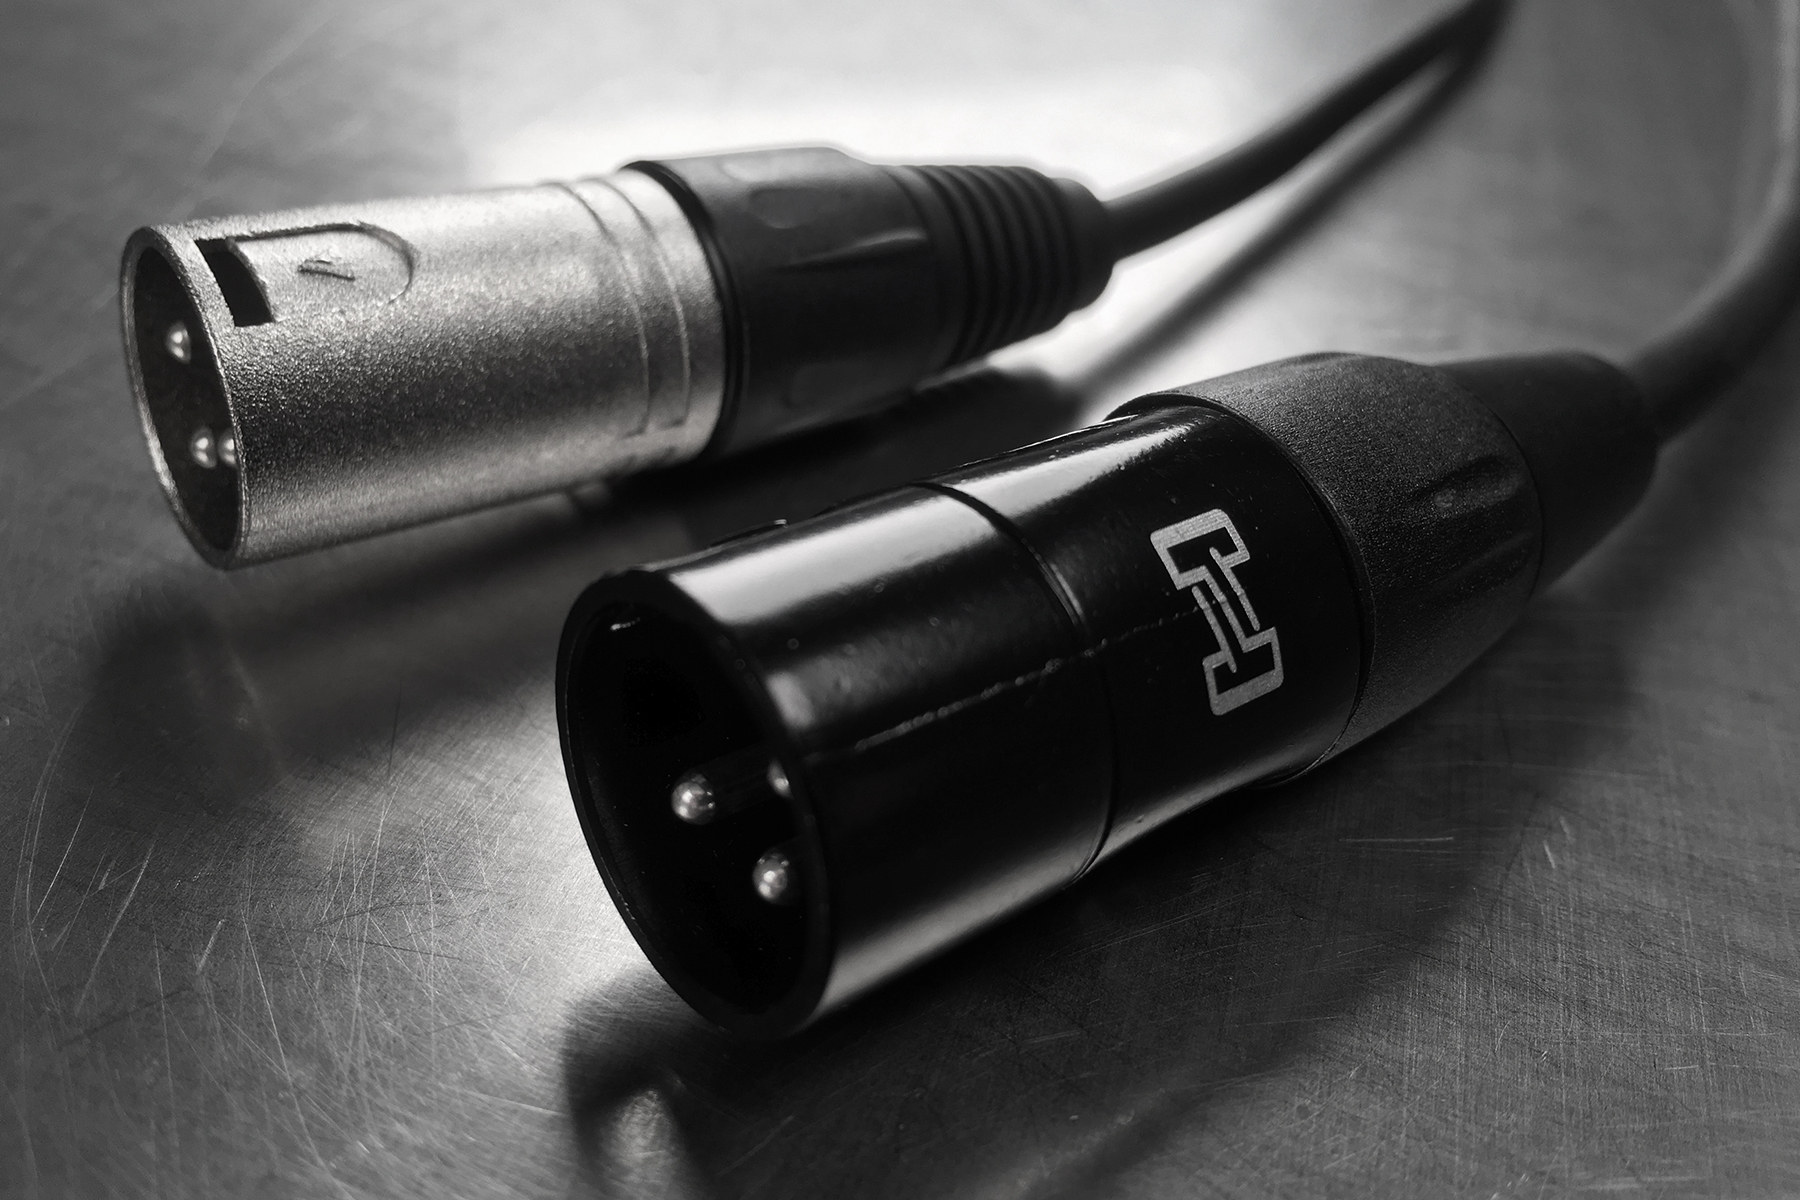
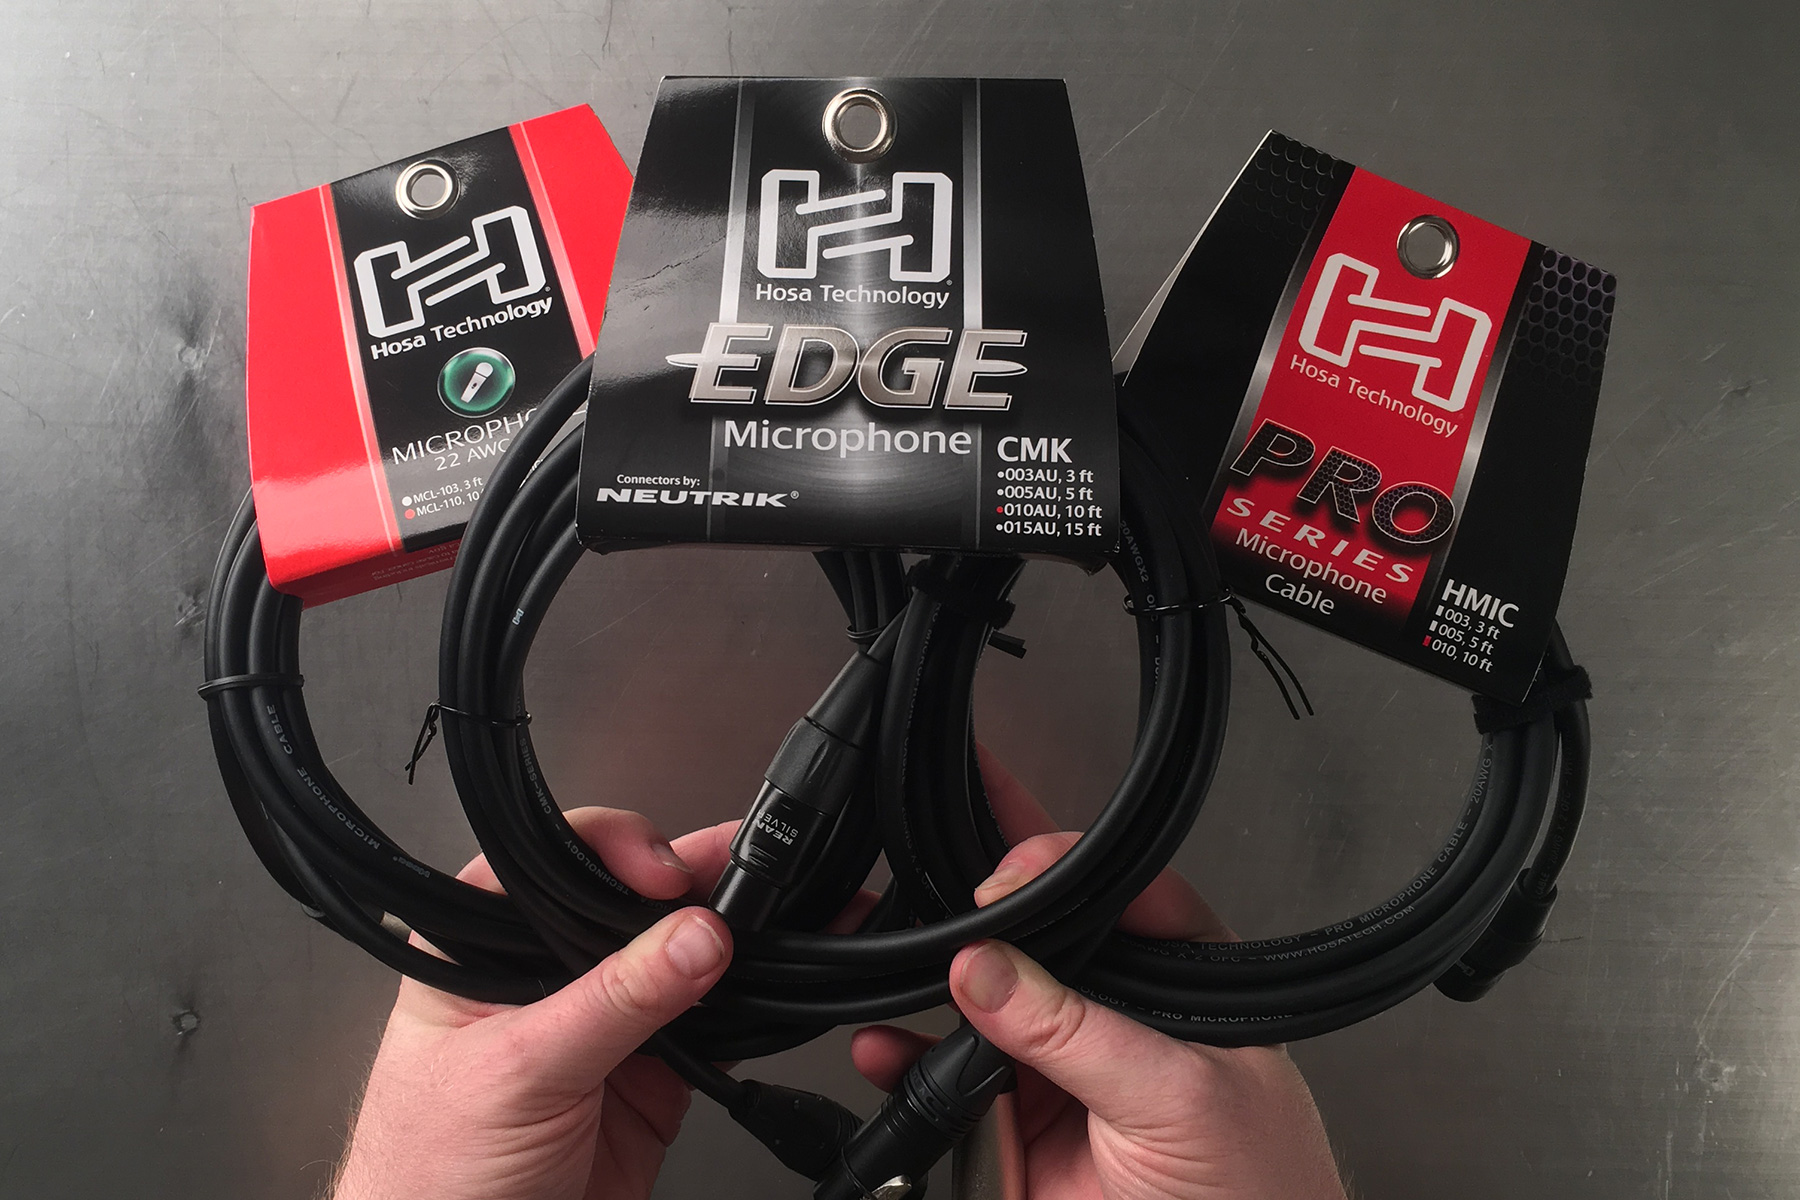
As you introduce multiple microphones for co-hosts or guests, your need for additional podcasting equipment increases. The first thing you’ll need is microphone cables. If you’re starting out on a budget, we suggest our Pro Series mic cables, which offer upgrades from our standard range at a minimal price bump. If you’re after the best signal-to-noise ratio and are investing in some nicer microphones and equipment, we suggest our flagship Edge series.
Hosa Pro and Hosa Edge Microphone Cables

Audio Interfaces for Podcasting

Using an audio interface to record your podcast will allow much better analog/digital conversion, better microphone preamps, multiple microphone inputs, and multiple headphone outputs when compared to a direct to PC setup.

Some common and affordable options include:

Audio Mixer

An audio mixer will allow you to easily control the levels in the room with a simple knob or fader, and run a single output into your interface. There are also some USB mixer options that take the place of an interface and plug directly into your computer.
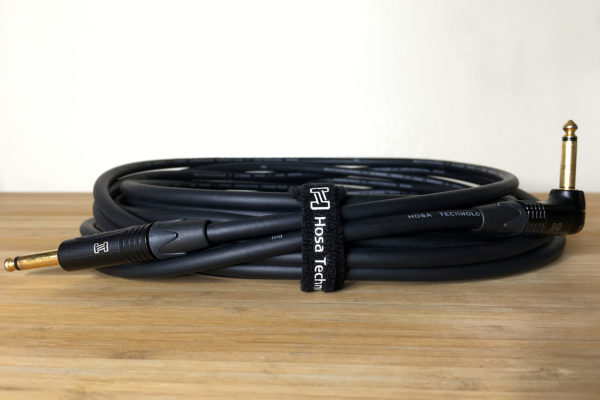
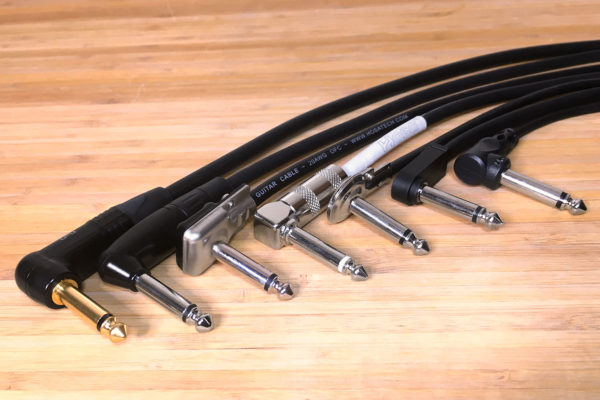
Podcast Cables

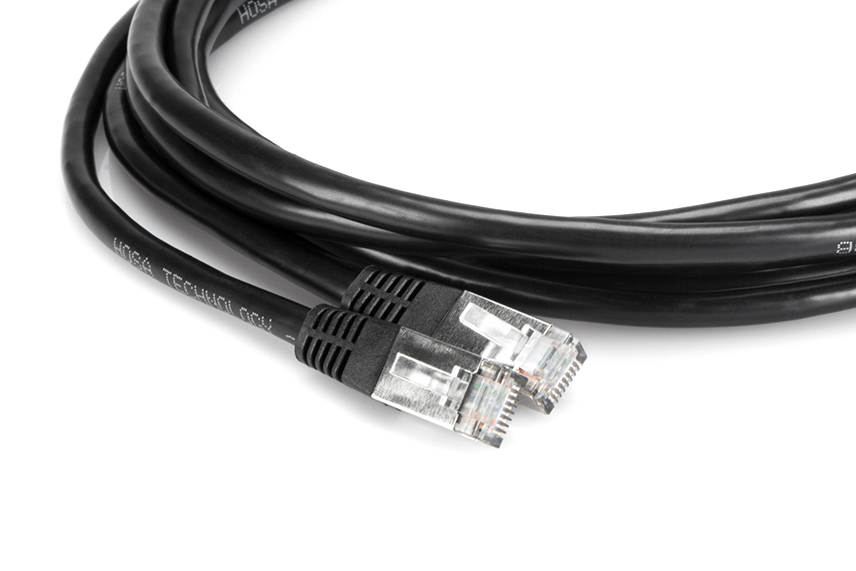
The cables you’ll need will be dictated by the equipment you have to work with. Some common cables for podcast use would be microphone cables for mics, headphone extension cables & adapters for headphones, interconnect cables for the mixer to an interface, USB cables for computer electronics, HDMI cables for any video podcasts, and cable organizers to keep the clutter down.

Additional Podcast Equipment

There may be some podcast equipment and accessories you don’t think about until you need them—don’t overlook these unsung heroes.

Microphone Stands

Microphone stands come in a lot of different styles, and can help keep your microphone secure while recording your podcast. You may prefer a tripod, tabletop, boom arm, or shockmount depending on your budget and setup.

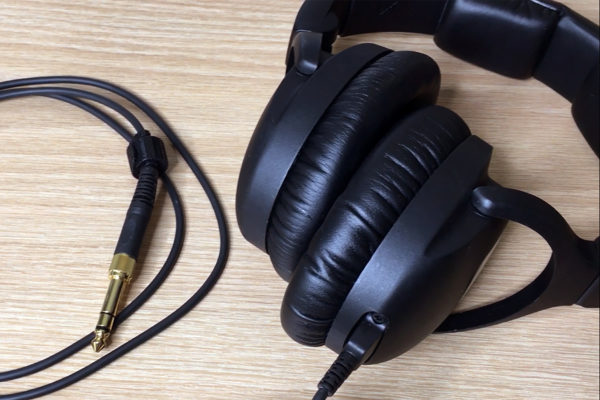
Headphone Extensions

Chances are as you expand your podcast setup, your microphone will likely be further away from your computer, mixer, or interface. Since cables on headphones tend to be relatively short, you may need a headphone extension cable to reach wherever you’re speaking so you can hear yourself and any co-hosts or guests during recording.
Podcast Equipment Headphones Headphone Extension Cable Hosa-Pro

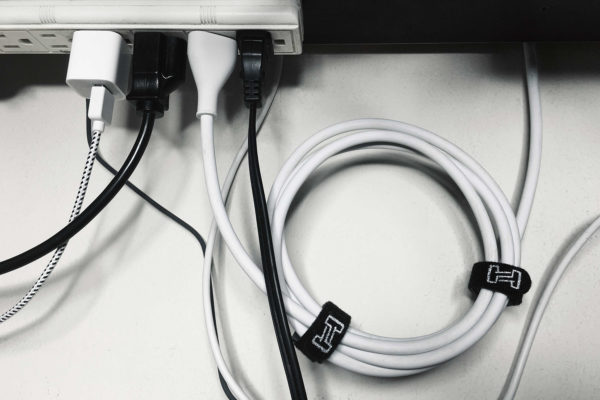
Cable Ties & Organization

Our 50 pack of velcro cable ties will help keep your area free of cable clutter. As your podcast setup expands, so will your audio cables. To minimize confusion, try using Hosa’s Label-A-Cable Cable Labels to help identify your connections.
Podcast Equipment Cable Organization Cable Ties Hosa

Pop Filters & Windscreens

These will help reduce levels of breath noises and sibilance, such as sharp S’s, allowing for smoother audio and less need for processing after recording. We also offer windscreens for traditional vocal mics.

Podcast Hosting Platforms

There are lots of platform options available for where to host your podcast, with a few popular, free, and inexpensive suggestions below:

Ultimately, you should look at the different podcast platform options available to see what features they include and find what best fits your needs.

While the equipment to start a podcast is important, always remember that being a good host includes some preparation, even if the medium feels very free-flowing. Marketing Showrunners wrote a great article on what it takes to be a great podcast host.

Podcast Setup on a Budget

There are many products on the market to fit a wide array of price points, but if you find yourself on a strict budget, here are some examples of budgeted podcast setups.

If You are Looking to Spend Less than $100

This will always be the hardest budget to fit, but chances are you can probably get your podcast started with simple means that you may already have or can find easily, like ear pods with a built-in microphone. These can be commonly found between $10-$30 and go directly into a computer mic input. If your computer requires the TRRS to be split to separate TRS inputs, you would need an adapter like the YMM-107. You could also pair an affordable set of headphones like the Hosa HDS-100 for around $30, and a Samson Meteor USB microphone for around $70.

If You are Looking to Spend $100-250

Stepping up your budget even modestly can open up a lot of options. At this stage you should probably look into USB microphones, with the Blue Yeti coming in around $130. It’s a good all-around USB microphone with low self-noise, and ability to change polar patterns. This will also allow you some space to upgrade your headphones, like a pair of Sennheiser HD 280 PRO’s around $100.

If You are Looking to Spend $250-500

This is where you start getting into interface and microphone territory. A Focusrite Scarlett Solo will come in around $120, which is an excellent entry-level audio interface. You can get a Rode NT1 condenser microphone bundle including a shockmount and pop filter for around $270, which is a great value. Bundle that with a Hosa Pro Microphone Cable for around $20, and an adjustable desktop stand for $20 as well.

So get out there and find your audience, because people have shown they’re willing to listen.

- Hosa

How to Clean and Disinfect Your Guitar and Audio Gear

Inevitably when you use music and audio equipment, you’re going to get some wear and grime build-up – and potentially expose yourself to unwanted germs. We use these tools with our hands and mouths and often leave them exposed to environmental elements. We want to highlight a few simple and inexpensive ways you can disinfect your gear and help maintain top performance and cleanliness.

How to Clean a Guitar

Guitars go through a lot. Not only are they used at home, but they are tools used to perform in front of hundreds or thousands of people at a time. Finger smudges, dirt, sweat, beer, germs, and sufficient DNA to clone someone are usually collected on any given guitar.

How Do You Keep Your Guitar Clean?

Keeping your guitars clean isn’t exclusively to do with chemical cleaners. How you treat and store your instrument goes a long way into keeping it clean and sanitized. Examples include washing your hands before and after playing your guitar, wiping your strings down after use, storing in a case when not being used, and not sharing your guitar with a different set of hands. Of course there’s no way to 100% guarantee your instrument doesn’t pick up unwanted germs and dirt, especially when being exposed to different environments, but simple steps can go a long way in keeping major maintenance and cleanings to a minimum.

Preparing Your Guitar for Cleaning

It’s always good to use a dry rag or towel on your guitar to get rid of any dust or dirt that might be lingering on the surface. You also want to check for sensitive areas and where to avoid the electronics.

How to Clean Electric Guitars

When using any cleaner, always apply a light amount to a cloth, preferably a microfiber cloth to not scratch the finish of your guitar. This will also give you much better control over where any cleaner or polishing solution is used and keep it away from your electronics. Applying directly to the guitar could also mean water droplets dry and oxidize the strings or other metal surfaces if they’re not wiped down properly. Wipe in a circular motion and give special attention to areas that might have more buildup or splotches. Be sure to dry the guitar with another microfiber cloth after applying.

How to Clean Acoustic Guitars

Acoustic guitars can be a little easier than electrics since many don’t have electronics, or those that do have them in a much smaller area. The woods on an acoustic guitar are more exposed, so be extra careful to only lightly saturate your microfiber cloth so the wood doesn’t absorb any moisture which could cause stains in the finish. Same general rules apply for wiping in a circular motion and being mindful of the electronics when present.

Best Guitar Cleaners To Use

There are plenty of guitar cleaners on the market, and even some traditional cleaners that work well, but you want to find something water-based like our Goby Labs Guitar Polish to help protect your guitar’s finish. Delicate finishes will damage with the caustic chemicals found in some alcohol-based cleaners, but water-based solutions are safe to use. Just be sure not to use too much on any open-grain guitar, which will absorb moisture. Make sure to always apply cleaner and polish with a microfiber cloth so that you don’t scratch the surface in the process.

Guitar with Goby Labs Guitar Polish, cloth, and cleaner

How to Clean and Sanitize Guitar Fretboards

Your fretboard, or fingerboard, is the area that will require the most attention since it’s where your hands are always making contact, building up dirt, grime, grease, sweat, and anything lingering on your fingers. In order to make sure you fully clean your fretboard, it’s best to remove your strings, or loosen them to clear the fretboard entirely. Use a lightly saturated microfiber cloth to wipe down between each fret in a parallel motion to the fret itself. Make sure to give special attention to the area right around the fret itself since that tends to collect the most dirt and grime.

Speaking of caustic chemicals, some solutions can dry out unfinished fretboards if used improperly. Rubbing alcohol is fine to use for disinfecting unfinished woods like rosewood, ebony, and maple. If you have a lacquered board, a cloth very lightly dampened with soap and water will do the trick. After disinfecting porous woods, like rosewood, apply our oil-based Goby Labs Fingerboard Conditioner to cut through grime without damaging the wood. Just make sure to apply it with a microfiber cloth and remove any excess oil after applying.

Goby Labs Guitar Polish and Fretboard Conditioner come conveniently together with a microfiber cloth in the Goby Labs Guitar Care Kit to ensure you have everything you need to care for your axe.

Goby Labs Fingerboard Conditioner with Guitar Fretboard

How to Sanitize Microphones

Microphones are probably the most challenging piece of gear to clean and sanitize given how frequently they come in contact with our mouths. Most cleaning solutions require pre-saturated wipes or a cloth partially saturated in an alcohol-based solution. However, there are some more convenient options.

The solution we most recommend is our Goby Labs Microphone Sanitizer. This sanitizer has the added convenience of simply being sprayed directly onto the microphone grill. It soon evaporates, without damaging the inner electronics. It’s the easiest way to sanitize quickly for venues and karaoke clubs where a single microphone is used by many people on the same night.

Goby Labs Microphone Sanitizer and microphone

How to Sanitize Audio Hardware

Surfaces on hardware usually only need a towel or rag lightly dampened with water or surface cleaner to wipe them down. You want to protect the electronics inside, so it’s never a good idea to spray anything directly on the surface, and always remember to power down any electronic device before cleaning and sanitizing to avoid shorting out the equipment.

Audio Equipment and household cleaners

For home studio applications, our Goby Labs Equipment Care Kit includes Headphone Cleaner to remove the dirt and grime build-up without damaging delicate electronics, Screen Cleaner that’s safe for use on LCD screens, Microphone Sanitizer, and a microfiber cloth.

Goby Labs Equipment Care Kit and gear

How to Clean Audio Cables

It’s usually a good idea to keep water away from cables so you don’t promote oxidation and corrosion, but after they’ve seen a few gigs and have been stepped on a few hundred times, we get it. A lightly dampened cloth with soap and water is sufficient to run along the length of the cord and housing of a connector, just don’t pull too hard to avoid severing the solder or creating a short in the cable.

Cleaning Audio Cables

Maintaining Your Connectors

If you wish to clean the contact points of your cables, it’s best to use an electric contact cleaner like CAIG Laboratories’ DeoxIT Gold, a less concentrated maintenance cleaner that leaves behind an added layer of protection.

How to Keep Your Hands Clean

At this point, you probably don’t need us to preach the efficacy of hand sanitizers, but it’s worth noting that Goby Labs also offers a 2oz spray bottle of FDA-approved hand sanitizer that fits conveniently next to our other cleaning solutions for gigging professionals on the go. Of course, good old-fashioned soap and water always works when available. Just make sure you wash your hands thoroughly for the recommended 15-30 seconds to ensure they are disinfected. A simple way to time yourself is singing “Happy Birthday” twice.

For those wearing gloves, we all know the sacrifice is your natural touch-sensitivity. This is why Hosa also offers HAND-E-GLOVE, a lotion that leaves a thin, invisible layer covering your hands. This allows for the best of both worlds with the protection of wearing a glove while preserving your natural sense of touch. We also offer HAND-E-SCRUB to clean and exfoliate your hands after use.

For more information on what solutions we offer to clean your musical instruments and audio gear, visit our Cleaners & Conditioners page.

- Hosa

XLR vs. DMX: What’s the Difference? 6 DMX Cable FAQs

If you’ve never worked in the world of lighting, DMX and XLR cables can be confusing at first, especially if you come from an audio background. But don’t worry. We’ve got answers to all your questions.

There are several cables that serve different functions but look similar or use the same connector types. For instance, 1/4 in patch cables and instrument cables, or 3.5 mm patch cables and stereo AUX cables that you would use to connect your phone to a speaker.

Two of the most commonly confused-for-each-other cables are XLR and DMX cables. In this FAQ, we’ll cover some of the basic differences to help you tell them apart.

Feel free to click on the table of contents below to find the answer you’re looking for.

XLR vs. DMX: What’s the Difference?

Both often have the standard 3-pin configuration and similar builds, and maybe, in some cases, the connector is the same on both. But go beyond the connector, and you have two cables with fundamentally different purposes.

Generally, DMX cables are used for lighting, while XLR cables are used for analog audio. This video explains more.

What is DMX?

DMX refers to the lighting protocol DMX512, which is a type of digital communication. The DMX standard was created in 1986 using existing XLR connectors to adapt to products already on the market without any proprietary connection.

It also introduced a 5-pin format with the intention of expanding its functions with the additional pins, however that is very infrequent so nearly every 5-pin DMX cable only has 3 soldered connection points with 2 unused pins. This makes 5-to-3 pin and 3-to-5 pin DMX conversions direct and simple depending on the equipment you’re using.

What is a DMX Cable?

DMX cables are what we use for lighting. The cable’s purpose isn’t to carry an audio signal. Instead, it carries information or data that will communicate changes between light and its source. The impedance required for this is 110 ohms.

DMX cables come in 5-pin configurations, and can be converted from 3-pin to 5-pin or 5-pin to 3-pin using our DMX adapters.

What are Some Features to Look for in a DMX Cable?

When looking for a DMX cable, you’ll first want to make sure it’s rated at 110 ohms. Then you should make sure it’s flexible and sturdy, preferably built with braided shielding and solid connectors. Don’t forget to check the lighting equipment you’re using to see if you require 3-pin or 5-pin XLR, or if you require a DMX adapter on one end to change between them.

What is an XLR Cable?

XLR cables are what’s most often used for analog functions such as microphones and interconnects. Analog has a much lower impedance requirement so cables don’t have to be rated. Usually, the impedance is between 45 and 75 ohms.

The most common XLR configurations are 3-pin and 5-pin, although some proprietary 4-pin XLR cables exist for certain audio equipment like intercoms.

Can You Use an XLR Cable Instead of a DMX Cable?

The short answer is yes, technically, but only in some cases. In general, it’s not advised.

DMX has a higher impedance than XLR. An XLR cable uses a different signal than DMX is built to handle. There are some instances where you can use them interchangeably, but again, it’s not advised or recommended.

Here are some of the complications you can expect if you try to use XLR for DMX and DMX for XLR.

The XLR for DMX Applications


An analog XLR cable is not rated at 110 ohms, which is based on the cable’s construction; so, transferring data may experience some interruptions. This means you might get strobing or flickering lights since the cable can’t transfer the necessary voltage. This won’t damage your lighting equipment, but this signal degradation causes inconsistencies in your lighting presentation and ultimately leads to frustration and a bad show.

XLR cables can also have a more rugged build, so the cable diameter may be larger, making it less discrete, bulkier, and heavier than necessary. For these reasons it’s not recommended to use analog XLR cables for DMX and lighting equipment.

DMX for XLR Applications


On the flip side, you could theoretically use a DMX cable as a microphone cable. However, the cables aren’t built with the same shielding, so noise interference might become an issue.

Likewise, DMX cable build quality isn’t meant to be as rugged as XLR. XLR cables are built to transfer sound and they’re used on microphones that get tossed around and stepped on all the time. They’re built to withstand the beating of a gigging environment.

DMX cables on the other hand aren’t constructed for that purpose and may not last nearly as long. DMX cables are also much more expensive because of the construction required to meet the 110-ohm standard. In some cases, DMX cables would also have a smaller copper conductor than analog XLR cables, and that may influence the resulting sound.

Conclusion

As always, it’s best to use the appropriate cable for the appropriate application. If you’re doing lighting, invest in some DMX cables to make sure the voltage is uninterrupted. If you need to go out from an interface to a pair of monitors, invest in some XLR interconnects, and, of course, use a dedicated microphone cable for all mic and performance functions.

Recommended Hosa DMX and XLR Cables

Everybody has different needs and different budgets to work with, and Hosa provides a wide range of solutions to fit them. If you need a high quality noiseless, transparent microphone cable, we highly suggest our Edge Series microphone cable. If you need an XLR cable between analog devices carrying line-level, we always recommend our Pro Series interconnects. For lighting purposes, we offer 3-pin DMX512 and 5-pin DMX512, as well as adapters and terminators.

- Dylan

Why Cables Matter – Your Questions Answered

Breaking down what a cable’s made of and why it makes a difference

It’s often the things we don’t think about that can have a huge influence on our results. In the world of cooking, it may be the type of knife or cutting board we use; in automobiles, the grade of oil put in our engines; in audio & video, the quality and type of cables can make for dramatic differences that often get underappreciated.

There will be some people out there who say that a cable is just a cable, that varying prices and shiny features don’t really matter or make a difference. Today we’ll be focusing on the construction of audio cables like instrument, microphone, speaker, and interconnects, and explaining the many differences you see in the marketplace and why they do, in fact, matter.

What is a conductor?

The conductor is the copper wire that transmits the signal from one end of the cable to another. How we measure the size of the conductor is in AWG, which is an initialism for American Wire Gauge. It’s important to know when measuring gauge, the higher the gauge is, the thinner the wire will be and the more resistance there is to the flow of current. The thicker a conductor is, and thus the less resistance there is to the flow of current, the lower its gauge number will be.

For example, our standard series speaker cables use a 16 AWG OFC (oxygen-free-copper) conductor, and our Edge series speaker cables use a 12 AWG OFC conductor. You can see the difference in the thickness of each cable alone, but you can’t just rely on thickness since there are instances where companies use a thin conductor with a thicker jacket surrounding it.

Why are there such stark differences in the size of conductors from cable to cable? Simply put, some require a larger conductor depending on how much voltage they’re trying to transmit. The amount a speaker cable needs to transmit signal & power requires much more than an interconnect that you would use to connect your audio interface to your studio monitors.

Along with copper, you may see other metals used in conductors and shields such as aluminum, silver, and gold. Our Zaolla Silverline cables, for example, use a solid silver conductor, which is much more conductive than copper. Our Edge guitar cables also use Neutrik connectors with gold plated ends, which is more conductive and less prone to corrosion than nickel. Of course, adding these components is significantly more expensive, hence you see them far less. On the opposite end, aluminum is a less conductive metal than copper but some inexpensive cables will use an aluminum conductor with a thin layer of copper over the top to reduce cost.


What are the types of shielding and what are the differences?

There are two main types of shielding used in audio cables: braided, and spiral or serve shielding.

Braided Shielding

Braided shielding is a woven mesh of bare or tinned copper wires which provides a low-resistance path to ground but does not provide 100% coverage. Depending on the tightness of the weave, braids typically provide between 70% and 95% coverage. Since copper has higher conductivity than aluminum and the braid has more bulk for conducting noise, the braid is most effective as a shield. However, it adds size and cost to the cable along with reduced flexibility depending on the tightness of the mesh.

Our own guitar cables use braided shielding and vary in this same regard, as well. For example, our standard series guitar cables provide 90% braid coverage, while our Edge series guitar cables provide 95%.

Spiral Shielding

Spiral or serve shielding is similar to a braided shield, but instead of being woven together, the copper strands spiral around the conductor. It’s more flexible, cheaper, and quicker to manufacture than a braid, but as it’s bent or twisted, you get more opportunities for gaps in the shield to open and absorb interference as the strands unspiral.

Our interconnects rely on spiral shielding, which is more than enough due to the fact that they stay mostly stationary and their signal is boosted to line level that’s less prone to pick up interference. Mic and instrument level is significantly lower, so any interference it picks up will amplify dramatically when the signal is boosted, hence the need for more robust braided shielding.

Foil Shielding

Although not common in the types of cables we’re covering, another shielding type you may encounter, such as in our network or Cat 6 cables is foil shielding, which is a thin layer of aluminum that provides complete coverage of the conductors it surrounds. It is thin, which makes it harder to work with, especially when applying a connector. It also tends to be an added layer to an existing shield.


Why so many types of connectors?

If you’re like most people and have owned multitudes of cables from different brands, you’ll no doubt have noticed that connector types vary widely in aesthetic and in build quality. While it would take a whole post itself to explain nuances for all the different connector types, we’ll use the XLR cables from our Standard, Pro, and Edge series cables to illustrate:

The standard uses a common connector with nickel-plated pins, metallic housing, rubber strain relief, and the conductors use lead-free solder connected directly to the pins.

The Pro series connector is made by REAN. It uses silver-plated contacts, which is a more conductive metal than nickel or copper, zinc diecast housing, chuck-type strain relief, and a rubber boot kink protection.

The Edge series connector is made by Neutrik AG which uses nickel housing with a zinc diecast shell, gold-plated contacts which are more conductive and less prone to corrosion than nickel, chuck-type strain relief, and a boot with polyurethane gland.


Are more expensive cables better?

In some instances, but not necessarily. Component quality can absolutely influence whether a cable is more expensive or not, but often times other factors like labor play a bigger part in how much the item costs. Take the example of Neutrik; While the components are top quality, much of the resulting cost is for the time, quality control, and lower tolerances used in their construction. You could build a connector using those same components overseas and the result would be less expensive to the consumer, but Neutrik’s manufacturing also comes with a well-deserved reputation of quality craftsmanship. There are other in-between scenarios where raw parts are manufactured overseas but then assembled in the United States to save on labor and material costs while still providing some quality assurance. So, having a cable manufactured overseas doesn’t inherently make it inferior, but it depends on the level of quality in craftsmanship that the manufacturer uses before putting products on the shelf.

We hope that was informative so next time you see a cable that lists its specifications, you have a better understanding of the quality to cost ratio in order to make an informed purchase based on which option best suits your needs. Any other questions, you can leave them in the comments of the YouTube video, or contact us directly with this contact form and we’ll be happy to answer them.

- Dylan

Future Proof Your Network

Category cables have been in use for a number of years. Most consumers will know these as network cables, Ethernet cables, or possibly even Cat-5 cables. However, they may not understand what Cat-5 means or how to determine if that is really the cable in use. Category cables have been upgraded multiple times and the vast majority of consumers are probably using Category 5e cable in their home networks. As our networking needs have increased, so have the cables, and a change is already underway to go beyond Cat-5e.

Category cables are designed to transfer data within networks. They are the standard method of connectivity for Ethernet networking. Cat-5e is still the most common cable but it is close to its limits. In fact, larger networks requiring higher bandwidth and better interference protection have already abandoned 5e. We are demanding more from our networks, transferring more data at faster speeds than ever before. In addition to Ethernet networking, category cables can now be used for audio and video networks. Dante audio networks transfer uncompressed multi-channel audio via category cables and HDBase-T promises to be the future of home audio and video integration. HDBase-T transmits high-definition audio and video, Ethernet, device control signals, USB data, and power all through one category cable. Category 5 cables cannot handle this much data.

In order to meet the bandwidth needs of newer networks, we must use Category 6 cable. Category 6 improves bandwidth and crosstalk protection over previous generations of category cable. It has been tested to perform up to 250 MHz and can transmit 10 Gigabits per second (Gbps) for up to 55 meters. This is not to say it cannot go beyond these points, only that this is how the cable was tested. Category 6 cables also have several shielding options. You can purchase cables in the more traditional Unshielded Twisted Pair (UTP) construction, or with shielding around each twisted pair, the full cable assembly, or both. Hosa’s CAT-600BK series is an example of Category 6 cable with both shielding around each twisted pair and around the entire assembly.

In addition to the original Category 6 cable, a revision to the standard later added Cat-6A cable, also known as Category 6 Augmented. This cable provides even better protection against crosstalk and has been tested up to 500 MHz. Cat-6A can run 10 Gbps Ethernet up to 100 meters.

It’s important to note that while Cat-5e was the updated version of the original Category 5 standard, there is no Cat-6e version recognized by ANSI/TIA.

The good thing about category cables is that they are backward compatible. If you are setting up a new network, it is a good idea to use Cat-6 cable even if you do not believe your network will need the added bandwidth. Taking that step now should make things easier in the future.

- Jose

Balanced Cables vs. Unbalanced Audio Cables – What’s the Difference?

The difference between balanced vs. unbalanced audio comes up frequently and is an important concept to understand when hooking up pro audio equipment. Before you start plugging things in, check if your devices use balanced audio or unbalanced audio so that you may purchase the correct cables only once.

What are Unbalanced Cables?

Analog audio cables consist of a shield and one or more conductors. Corresponding connectors must then have at least two points of contact. Cables that only have a contact point for the shield and one signal are unbalanced. An example of this would be a guitar cable, as it uses 1/4” TS connectors. In this example the sleeve of the connectors is the shield and the tip is used for the signal.

The problem with unbalanced cables is that if any noise enters the signal as it passes from one end to the other, that noise is added to the sound when it reaches its destination. This is precisely the reason balanced audio was created.

Unbalanced Cable Connectors

Some connector types are inherently unbalanced, so any time you see them present, you know that particular connection is one half of a balanced signal, or a single unbalanced input. RCA (or phono) connectors are always unbalanced, as are TS ¼” jacks.

TS

TS stands for “tip/sleeve,” which refers to the points of the cables that are soldered. A TS cable will feature a ¼” or 3.5mm connector and are easily identified by having a single band near the tip. This band is often black, though a clear band is also used, and its purpose is to separate the two contact points. Most commonly these are used for instrument cables or modular patch cables.

RCA

RCA connectors, or phono connectors because of their original use with phonograph players, are used in a lot of audio equipment. It’s rare to see a single RCA cable, as they will usually come in pairs, or sometimes in triples for component video cables. Like TS connectors, these have two contact points. The placement of the contacts on RCA connectors is different from TS connectors. The RCA connector shield is a circular surface around the center pin contact. When connected, the pin makes contact inside the device RCA jack and the shield makes its contact around the jack.

What are Balanced Cables?

In balanced audio, the signal is duplicated and carried on two separate conductors. The trick is that one of the signals is flipped, or inverted, to be the polar opposite of the other – one is positive and the other negative. At their destination, the negative signal is changed back to positive and combined with the original. At the same time, the noise traveling on the negative signal is also flipped and becomes the polar opposite of the noise on the positive signal. The result is any noise equally picked up by both conductors is rejected at the destination.

Microphone cables, like the Hosa Edge CMK-010AU, are examples of balanced cables. Microphone levels are very low and the best way to keep them noise-free is to use balanced audio. Microphone cables with 3-pin XLR connectors, audio interconnects with 1/4” TRS connectors, and even interconnects with 3.5mm TRS connectors are examples of balanced audio cables if they are interconnecting devices using balanced audio.

Balanced Cable Connectors

Just like unbalanced cables, sometimes you can tell which cables are balanced just by the connectors that are used. TRS and XLR would be the most common connectors used for balanced connections.

TRS

TRS stands for “tip/ring/sleeve,” which refers to the points of the cables that are soldered. A TRS cable will feature a ¼” or 3.5mm connector and are easily identified by having two bands near the tip. These are more commonly used for single-cable stereo signals. It is important to note that an analog stereo signal traveling along a single cable with TRS connectors is not balanced. More on that in the next section. In a typical balanced application, the original signal is wired to the tip and the inverted signal is soldered to the ring contact.

XLR

XLR cables most commonly feature three pins, though they can be found with four or five pins in some applications. The three pins will carry a positive charge, negative charge, and ground. Most pro audio equipment uses XLR connections, which are sturdy and feature a locking mechanism. When using 3-pin XLR, pin 2 has the original, or positive, signal while pin 3 gets the inverted signal. Pin 1 of the XLR connector is the shield contact.

When Balanced Cables Become Unbalanced

It seems pretty easy when it comes to cables, right? If the cable has two points of contact, it’s unbalanced; and if it has three, it’s balanced. Well, not quite.

A 2-conductor cable is not strictly a balanced cable. The devices in use determine the function of the cable. The Hosa CSS-110 is a 1/4” TRS interconnect. If you use this cable to go from the balanced left output of a mixer to the balanced input of a powered monitor, it is a balanced audio cable.

Take the same cable and use it to hook up the stereo headphone output of a mixer to a headphone amp, and you’ve got an unbalanced stereo cable. In the second example, one conductor is carrying the left output of the mixer and the other, the right output. This cable is not carrying the same signal along both conductors and is therefore not passing a balanced audio signal.

Pros and Cons of Balanced vs. Unbalanced Audio

The biggest weakness of unbalanced cables is their susceptibility to picking up noise, so the longer a cable is run, the more interference it will pick up and the more the signal strength will diminish.

Balanced audio solves that issue with a design based on reversing the polarity of any noise generated along its run. Ideally, you want to use balanced audio when possible but the use of balanced audio is determined by the devices generating the signal, not the cable. You cannot connect a balanced TRS cable to a device with an unbalanced TS output and get a balanced signal. Lots of audio equipment still uses unbalanced audio. Best practice when using unbalanced signals is to keep your cable runs short.

It’s important to always verify the type of cable you will need for the equipment you plan on connecting. Take the time to understand the connector types and the signal transfer formats before you begin researching the cable you wish to buy. Knowing this information before you go shopping for cables will save you time, which is better spent putting your new pro audio equipment to use.

- Jose